
Leading video editing platforms like Final Cut Pro, Premiere, and Resolve often adopt features from one another. This process can happen rapidly, such as Resolve incorporating FCP’s Voice Isolation, or it can take years, as seen with Premiere adopting a timeline ripple operation akin to FCP’s new version rather than the older one.
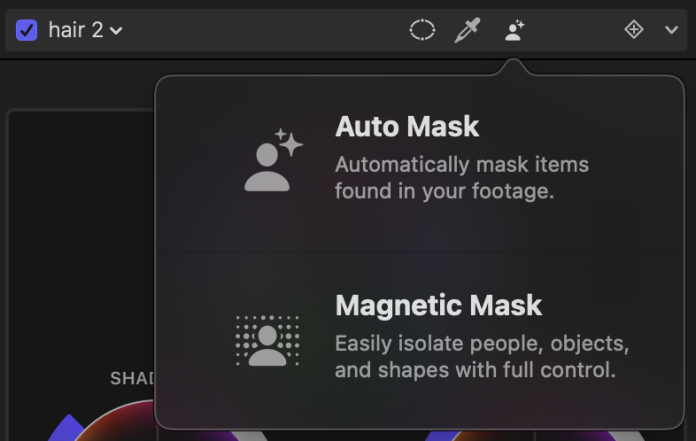
FCP’s Magnetic Mask, inspired by Resolve’s Magic Mask, and later mirrored by Premiere’s Object Mask, showcases how these tools enhance all three applications. At present, Auto Mask is exclusive to FCP, delivering outstanding performance without traditional tracking methods, offering an effective alternative in many scenarios.
Auto Mask doesn’t rely on tracking a subject through a scene; instead, it recognizes elements like individuals, scene components, or pets in real-time across each frame. This method effectively handles occlusions, making it ideal for tasks such as selective color correction and more.
Although previously discussed in my FCP 12.3 article, revisiting Auto Mask is worthwhile. Here’s a brief overview before diving deeper into its functionalities.
Understanding the Basics of Auto Mask
Getting started with Auto Mask is straightforward:
- Apply the Auto Mask effect from the Masks and Keying section directly to a clip to manage its visibility.
- To limit an effect or color correction, click the Auto Mask button present in every effect header. You’ll also find Shape Masks and Color Masks here.

The Auto Mask menu offers a choice of 17 masks for revealing specific elements:
Person Masks
- People
- Skin
- Skin and Face
- Hair
- Facial Hair
- Mouth
- Lips
- Teeth
- Eye
- Eyebrow
- Clothing
Scene Masks
- Sky
- Foliage
- Foreground
- Background
Animal Masks
- Dog
- Cat

Auto Masks can be combined, subtracted, or intersected with others. For example, you might select foreground animals excluding cats. Options for Shrink/Expand, Erode, and Blur provide fine-tuning capability.
When applying color corrections, the standard Inside/Outside switch is available, allowing changes on either side of the mask. Masks can be inverted via the menu beside an effect header if necessary.

Alongside Auto Mask, Magnetic, Color, and Shape Masks are still available, providing flexibility for mask amendments. While usually unnecessary, some shapes may require additional recognition adjustments to maintain consistency across frames, such as side-viewed lips or gaps between over-ear headphones and the head.
Generally, Auto Mask is highly reliable, fast, and effective in most scenarios.
With the basics covered, let’s explore practical workflows utilizing Auto Mask.
Enhancing Color in People Shots
One practical application is color correction for individuals. Subjects may be sensitive about their appearance in professional videos, and Auto Mask facilitates various changes effortlessly.
For instance, altering a lipstick shade that doesn’t translate well on camera is now straightforward. By adding Color Wheels and applying an Auto Mask to Lips, you can achieve desired modifications, ensuring accurate mask detection on each frame.

Teeth whitening is easy using saturation reduction with exposure adjustments, and an Auto Mask set to Teeth. Adjustments to eyebrows and skin tone work well, too. Clothing selection is straightforward, though further masking may be needed for specific limitations.
Bear in mind an essential rule from my retouching days:
- Slight alterations yield more convincing results than drastic changes.
Complex changes, like altering hair color, require more than a simple hue adjustment. Start with Color Wheels to tweak saturation and hue across shadows, midtones, and highlights. For intricate control, Curves are invaluable.
Jenn Jager’s video offers an excellent demonstration of these capabilities:
Mouth Censoring
For covering up profanity, Auto Mask provides a straightforward solution. Blade the section to be covered, apply the Pixellate effect from the Stylize category, and set Auto Mask to Mouth. Adjust block size, Expand, and Blur as needed. For audio, replace it with a beep using the Test Oscillator audio effect.
Brad West’s video offers a visual walkthrough of this and other techniques:
Adding Color to Black and White Footage
To restore color to black-and-white footage, apply different corrections to various parts of the image. Alternatively, use the Tint effect on a color image to achieve a flat-color appearance.
Robin Kurz’s video provides more insights into this and other tips:
Replacing Skies: Basics and Beyond
Basic sky replacement involves color correction. Add Color Wheels, tweak settings, and apply an Auto Mask set to Sky for a vibrant sky. For true replacements, integrate your own sky.
Robin covers most of this, while Dylan Bates explains how to manage moving shots effectively:
Incorporating Titles Seamlessly
Integrating titles into scenes is more accessible with Auto Mask. Use a tripod shot with clear foreground and background elements:
- Duplicate the clip and align it perfectly.
- Hide the original clip with V.
- Apply Auto Mask to the top clip, retaining subjects. Adjust selection with additional masks if necessary.
- Place a title between the clips.
- Reveal the original clip with V.
Brad West and Dylan Bates demonstrate this technique in their videos.
Relighting Elements in a Scene
While tracked shape masks are ideal for simulating dynamic lighting, Auto Mask excels in subtly altering background or foreground lighting.
Simply apply a Color Board or Wheels to a clip, then mask to the Foreground or Background. Selective exposure adjustments are also possible, enabling easy fixes for unexpected lighting discrepancies on clothing or skin.
Exploring Selective Visual Effects
If your project embraces a lo-fi aesthetic, Auto Mask offers creative possibilities:
- Stylize > Halftone with Person mask for a newsprint effect.

- Comic Looks > Comic Ink on Hair for comic book-style hair.

- Tiling > Visual Echo with inverted Person mask to highlight the subject among clones.

- Tiling > Kaleidoscope with Person or Foreground mask for a silhouette effect.

- Third-party effects like FxFactory Pro’s God Rays applied to backgrounds can yield impressive results.

Note that effects altering image movement adhere to the original mask position. Experiment with Handheld effects to shift shots within the subject’s outline.
Limitations to Consider
While altering skin color is simple, smoothing wrinkles is trickier. Gaussian Blur isn’t suitable, and none of FCP’s built-in blurs address this effectively. I’m currently developing a skin smoothing plug-in; feel free to inquire if interested. In the meantime, Pixelmator Pro’s Selective Clarity adjustment can help, although it requires external processing before importing back into FCP with a Skin mask.
Applying blur to backgrounds can appear unnatural. Ideally, a depth mask applying blur selectively across the image is required—a technique not yet perfected. Large sensors with wide apertures still have their advantages.

Auto Mask can serve as a green screen alternative, but flickering may occur with smaller masks or around larger mask edges. Enhancing temporal stability control could address these challenges.
Additionally, while Auto Mask playback is impressive, it can affect render times. For smooth playback, use ⌃R to render specific clips as needed.
Conclusion
Auto Mask simplifies the isolation of various shot elements without preliminary tracking, streamlining experimentation and changes that were once tedious or complex. Although not a universal solution, its utility is significant, likely prompting similar features in Resolve and Premiere soon. Upgrade to FCP 12.3 to explore these innovative possibilities.